Auth Made Easy: Setting up a trusted relationship between app registrations in Azure
In today's article, we breakdown how to create a trusted relationship between a frontend SPA application and a backend API application in Azure.
One of the challenges I find with documentation on Azure is that whilst there’s a breadth of it, it tends to be scattered and you have to know where to look.
Tying things together can be a real challenge for someone who is still figuring out how it all works.
One of the common things I have had to do is create a trusted relationship between a frontend SPA application and a backend API application.
Today I’ll be going through the steps on how to do this in the portal.
Now, before you @ me, I know you can do this as infrastructure as code, and this would absolutely be my recommendation for those comfortable with Terraform and Azure. However, I’m a strong believer that for those getting to grips with something new in Azure, it’s best to first do it either through the portal, or through the Azure CLI so that you understand and get familiar with what is being created.
If you really want to know how to do it in Terraform, that’s a story for another day…
1. Creating the frontend app registration
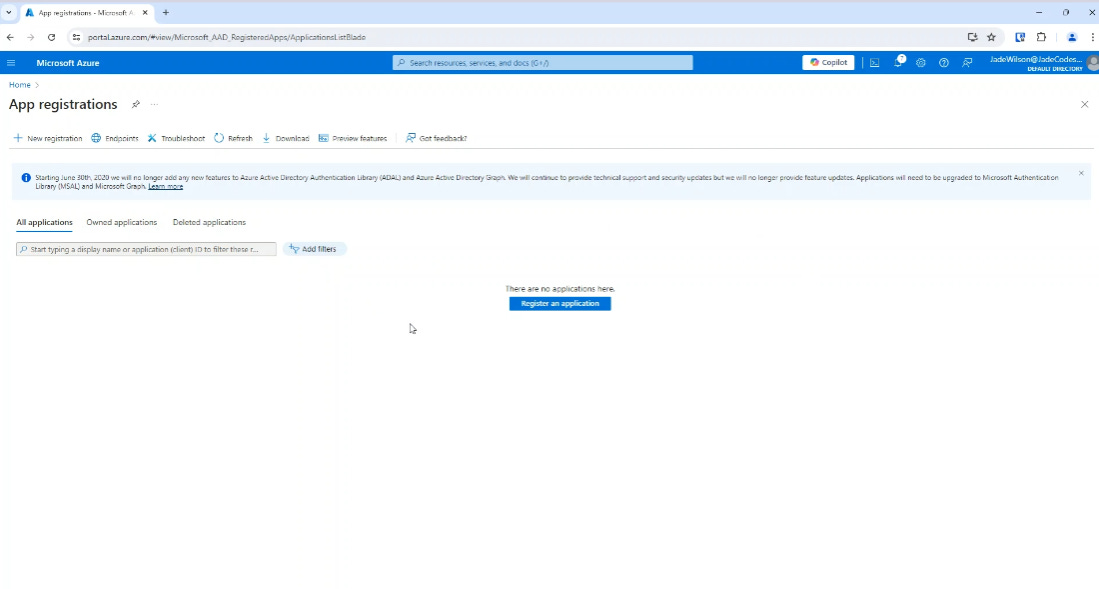
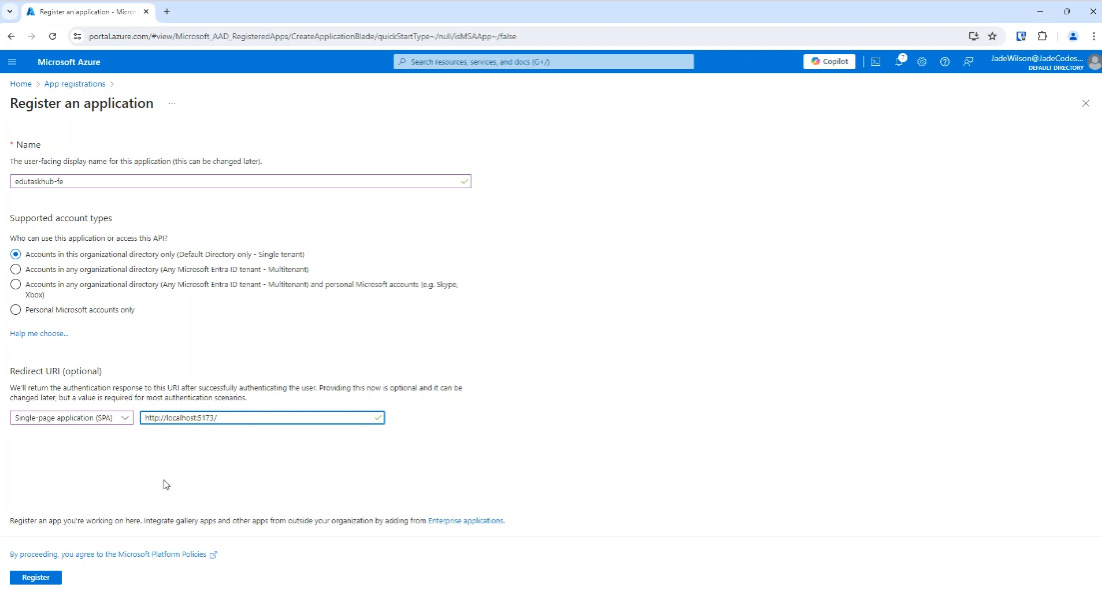
First of all we need to go into the portal and create an app registration for the frontend:
You can do this either by searching for ‘App Registrations’ in the search bar, or going through the Microsoft Entra view.
When creating this, we just need to ensure that we are pointing to redirect URI to our development redirect URI, this so happens to be the ‘http://localhost:5173/’ for our React w/ Vite application.
2. Creating the backend app registration
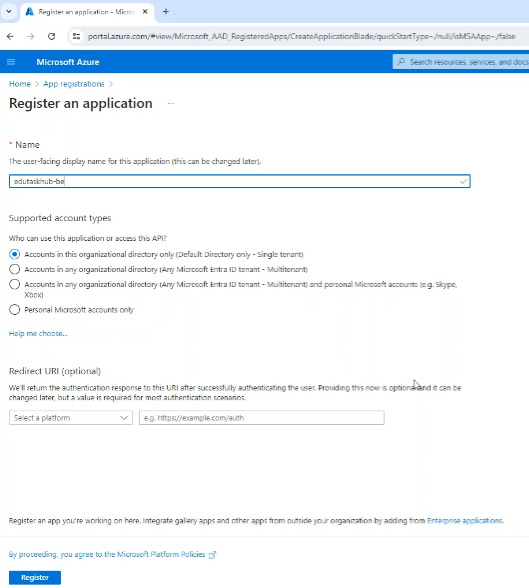
Similarly, let’s create the backend app registration:
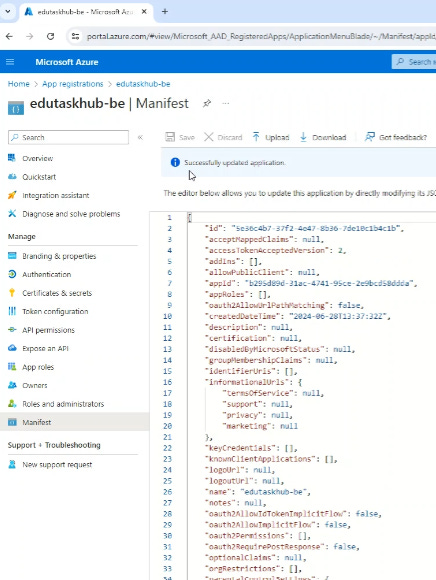
Because the backend is going to be an API, we need to configure it so that it will accept access tokens. Otherwise, it will reject any access tokens you try to pass through.
If you go to the backend manifest page, you will see there is the ability to update the manifest.
There is ‘accessTokenAcceptedVersion’ which will initially be null, this needs to be changed to 2.
3. Creating a scope in the backend
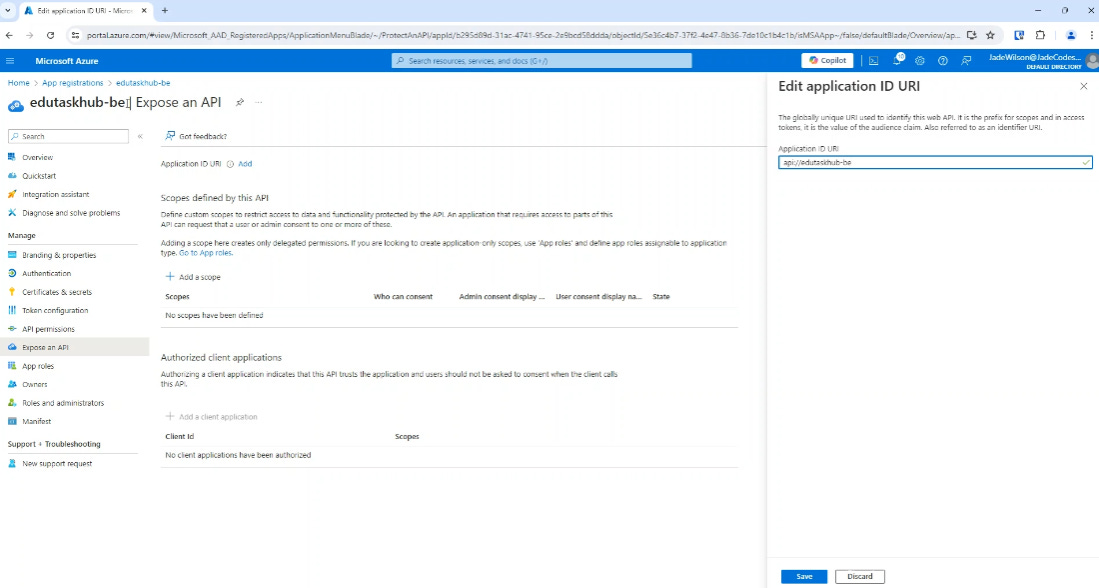
The next thing to do is create expose the API, we do this by going on the ‘Expose an API’, this allows us to say our API can be used by other applications.
The first thing we do is set the Application ID URI, I like to make this a unique name rather than setting it to the ID, this means if I wanted to delete/recreate the backend app registration, I wouldn’t need to change the configuration of the scope my frontend is accessing.
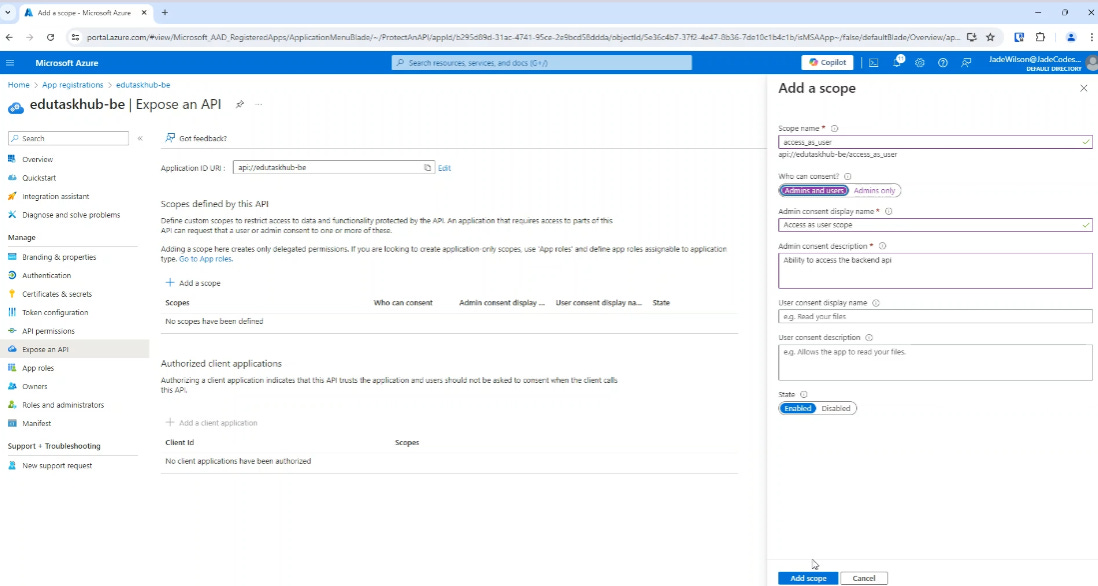
We then create a scope.
I’m going to create an ‘access_as_user’ scope and allow both admin and users to consent:
If both admins and users can consent, it just means that you the admin doesn’t have to grant access first (you’ll see more about this in the next section).
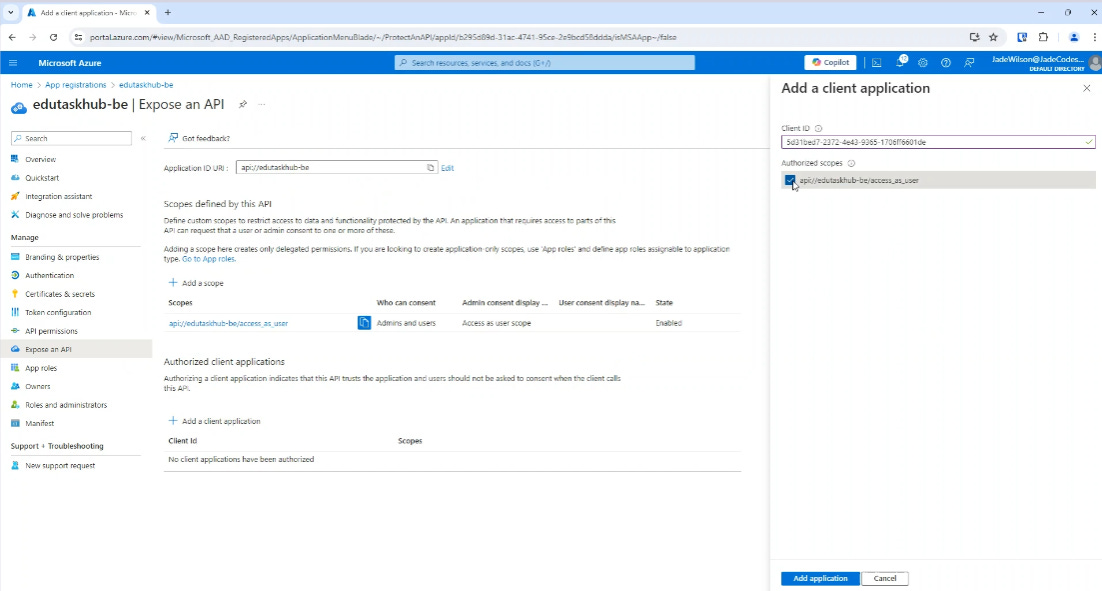
Finally, we then add the frontend application id to be an authorized client application and give it access to the ‘access_as_user’ scope.
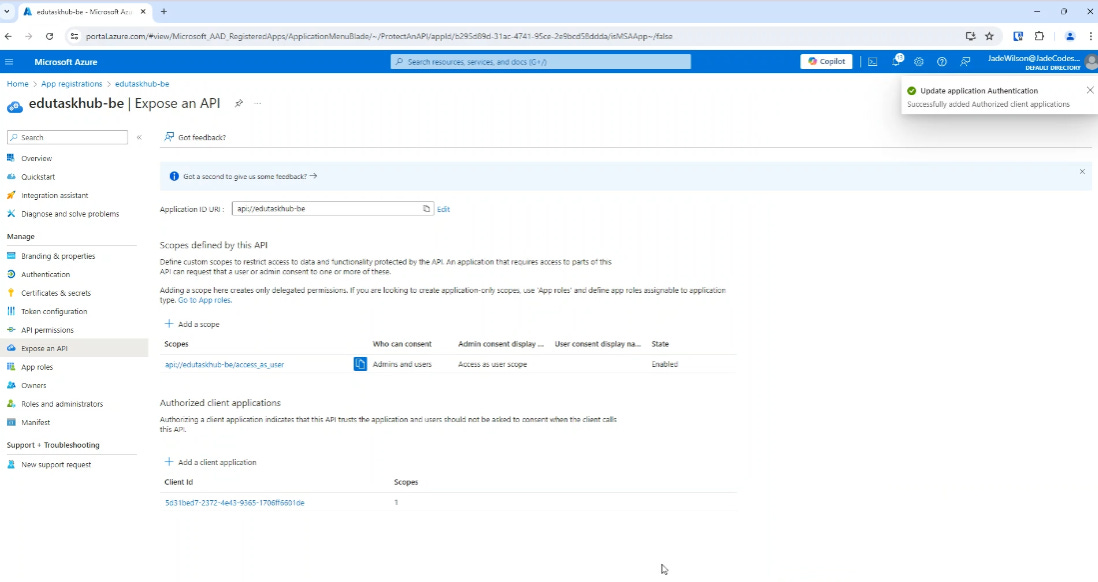
And you can see this adds it to your ‘Authorized client applications’:
4. Adding API permissions to the frontend
The last thing to do is go to the frontend and add the API!
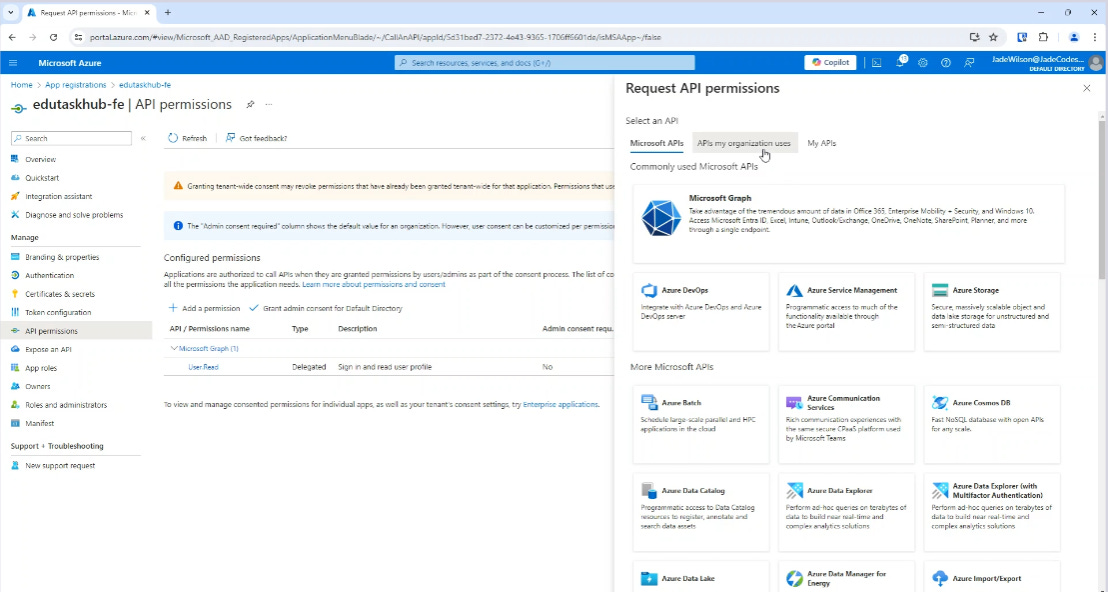
We do that by going to:
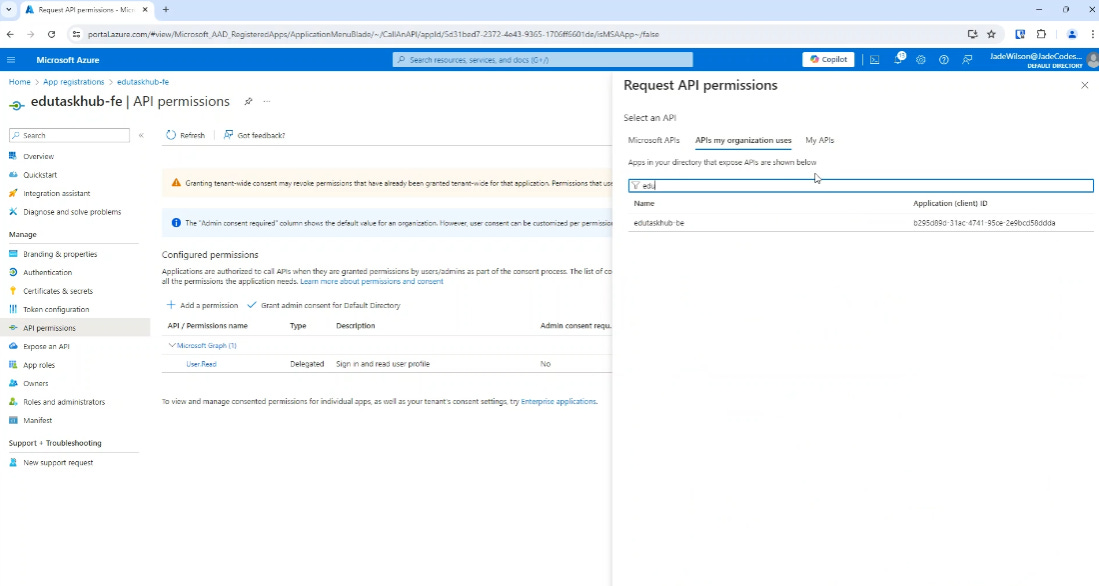
API Permissions → Add a permission → APIs my organization uses
Then we can search for out backend application:
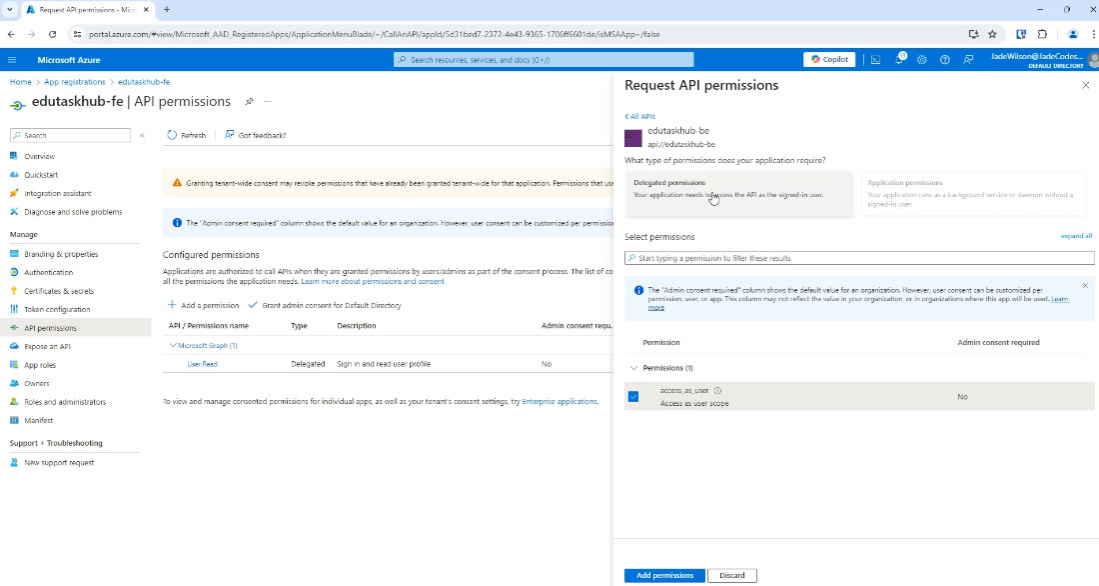
Then we can request delegate permissions, what this means is that this requires a user to be signed in.
You will notice that there isn’t the option to add ‘Application Permissions’, in order to add application permissions this needs to be done using ‘App Roles’ rather than by creating a scope.
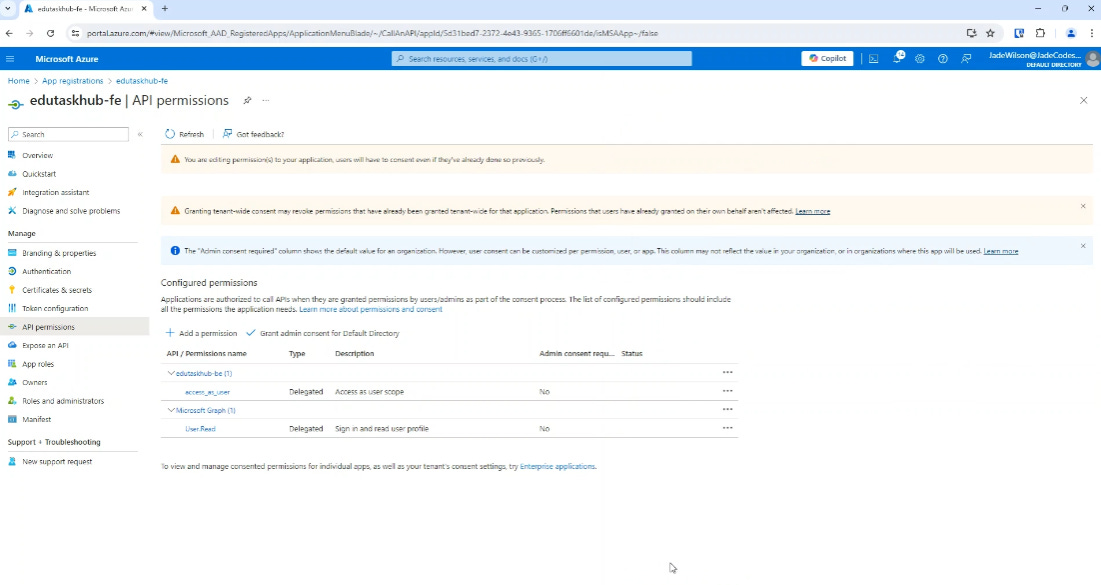
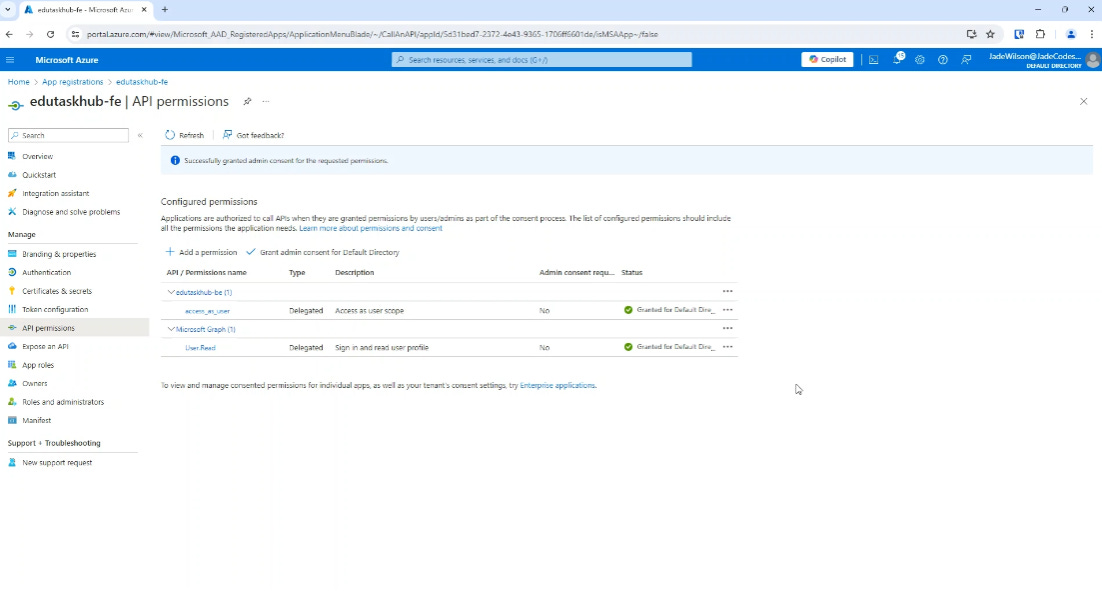
One you’ve added the permission, you can see now it will say you have access to the backend.
I’m also going to grant admin consent, but this isn’t mandatory as you can see the ‘Admin consent required’ is set to no, but it just means the user doesn’t have to consent.
And there you have it! A trusted relationship between a frontend and backend application in Azure.
Easy peasy, lemon squeezy.
That’s all from me…
Next time in this series, I’ll show you how you can test this with a python fastapi backend!
If you would like to see the video on this, check it out here:
Articles I enjoyed this week:
By
By
By




Thanks for the shout-out Jade.
Great article.