Auth Made Easy: Getting started with MSAL and React (w/ Vite and TypeScript)
In today's article, we breakdown how to get authenticated using MSAL in React
I do a lot of authentication and authorisation as part of my role.
A lot of our customers are wanting to use Microsoft Entra (formerly Azure Active Directory) as their primary mechanism of authentication and authorisation, and so we often work with them on how they can build their systems around it and our other services we have.
One of the most common libraries we use is the MSAL library. MSAL stands for Microsoft Authentication Library, it provides you with the necessary interfaces to sign in with Microsoft Entra and also handles the authentication flow, identity tokens, access tokens and refresh tokens needed to authorise the user.
In today’s episode, I go through getting started with MSAL and React.
The pre-requisites you will need for this are:
An Azure Tenant and Subscription, with Azure AD Privileges. You can sign up for a free 12 months here if you don’t have an account already.
An IDE of your choice, I am using VSCode.
Node and NPM (or a package manager of your choice) installed.
A Vite project - I am using react-ts template as described here.
@azure/msal-browser and @azure/msal-react libraries installed.
What is an App Registration?
An App Registration is a way of uniquely identifying your application within Azure. When you create an App Registration it creates a trust relationship between Microsoft Entra and your application.
It allows you to set up Users, Redirect URIs, Identity Tokens, Access Tokens, Claims, Scopes, Permissions, Roles and much more on the application, it’s highly configurable so you can tailor it to a customer’s scenario.
In today’s episode, we’re going to be using the flow as described here.
Creating the App Registration
First we need to create the app registration.
For simplicity, we will do this in the portal, if you want a tutorial on how to do it via terraform, let me know and I can cover that separately.
If you go into the portal you should be able to go to:
App Registrations → New Registration
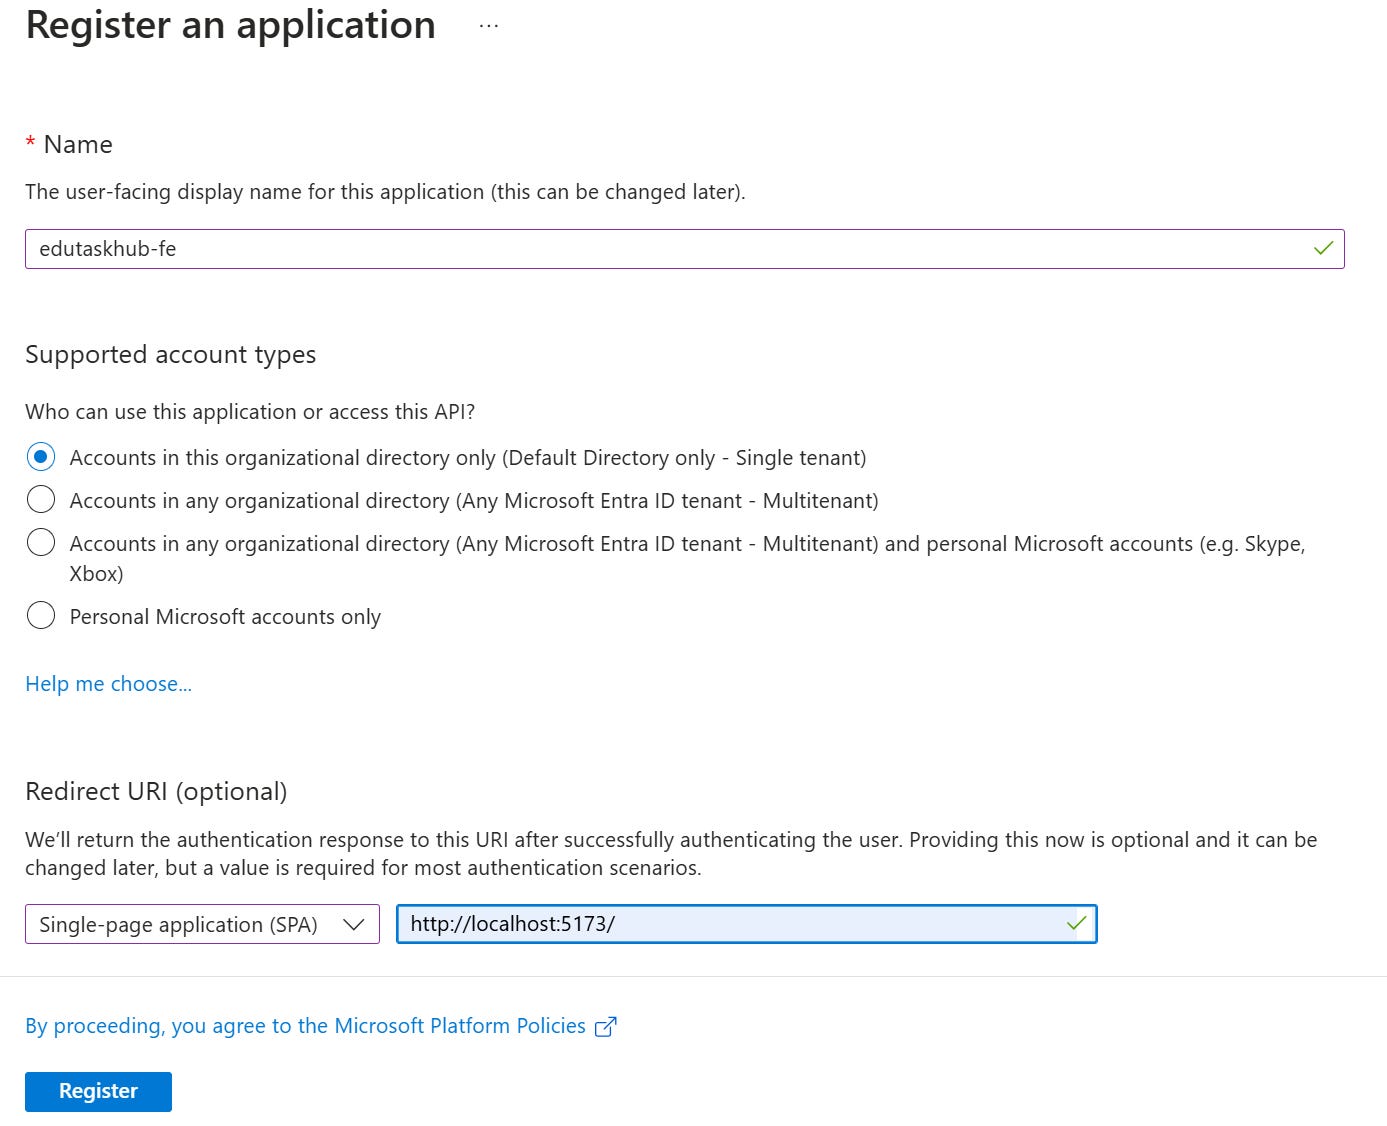
And this will then bring you to register your application:
There are a few key things to note here:
Name - You can give it any name you want, I have added the suffix ‘-fe’ to stipulate this is the frontend app registration.
Supported Account Types - If you want the application registration to work across tenants, you would set this to be multitenant. In our case, we’re going to be focusing on single tenant.
Redirect URI - This needs to match the Redirect URI that is going to be configured in the application, we are going to set this to be a ‘SPA’ redirect and to the URL of our development environment ‘http://localhost:5173/’
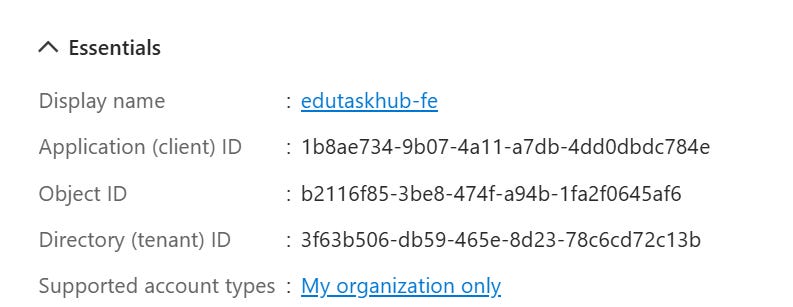
Once we have these configured, create the app registration and take note of the tenant id and client id displayed here:
You will typically create separate app registrations for your front end and backend applications.
Getting started
I just want to give a little bit of a shoutout to MSAL Samples, there are some great samples that help you get started with your journey, and you can access them here. I have found these samples to be so useful in creating templates for me to work from, I definitely recommend taking inspiration from them!
In short, there are four key files we need to be creating/altering.
main.tsx - This will be using the app provider to create a wrapper around the application.
app.tsx - This will be using the msal instance to get the user information to decide what to display.
app-provider.tsx - This will be setting the active account of the user.
app-config.ts - This will be configuring the values needed in order to login with msal.
Making send of MSAL Config
If we take a look at the MSAL Config we have to alter the following:
Where clientId is the application (client) id of the app registration and the authority is the URL of the authority to get request tokens from, you can typically find the documentation for the correct URL to use here.
Because we are using single tenant, we need to add the tenant id to the authority.
Note: In a production environment I would recommend adding these as environment variables so that they are easily configurable.
Creating an Auth Provider
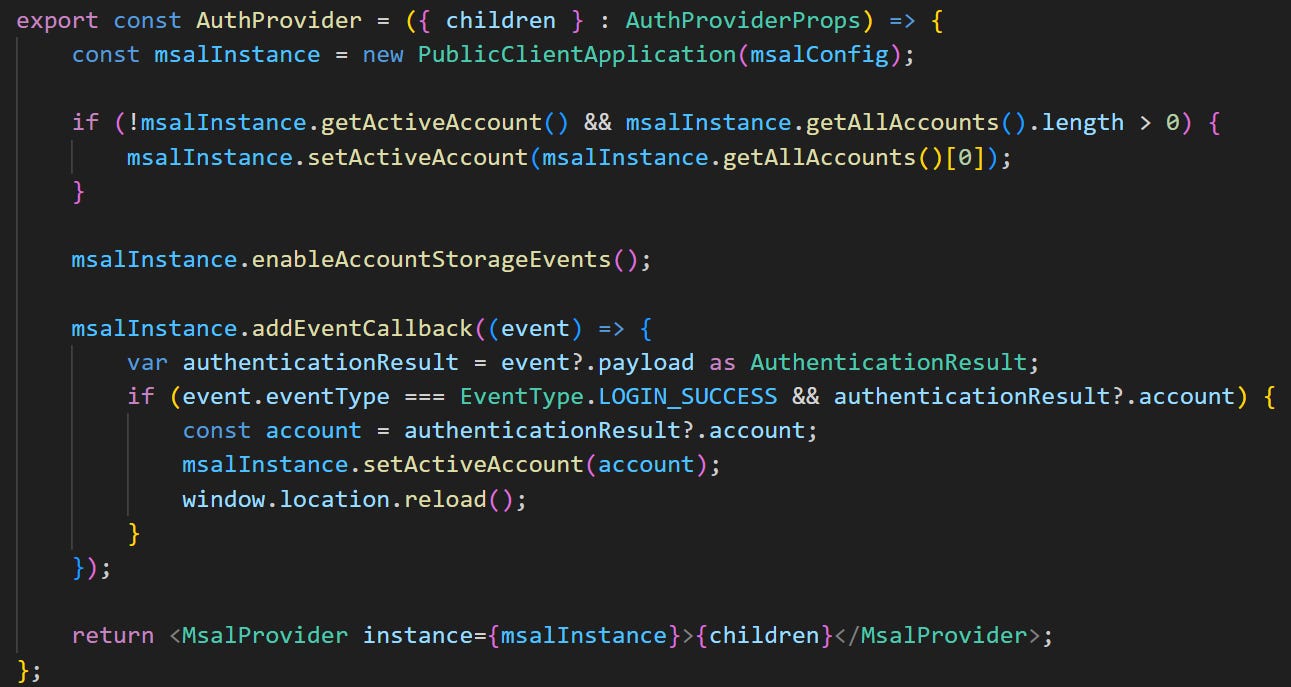
We are going to create an auth provider that will set the active account.
Where we first create an instance of the public client application using the MSAL configuration from the previous step.
We then set the active account based on whether there is an account in the list of all accounts, or when a successful login has occurred.
Once that’s done we then return the MSAL provider with all the children nodes of the application wrapped inside of it.
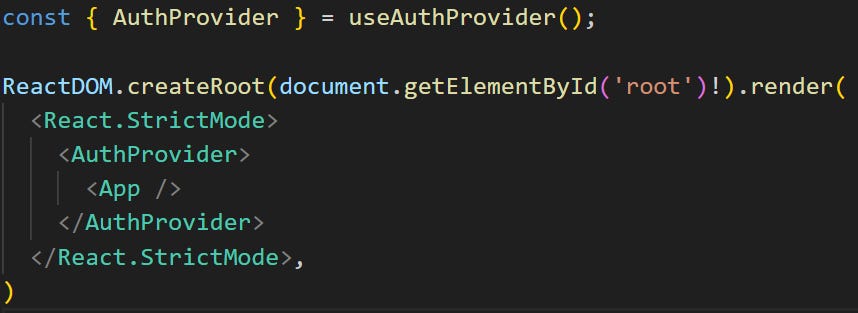
We can then reference the AuthProvider in our main.tsx file and wrap that around our application code.
Tying it all together
Now, we want to verify that the authentication works, we can do an initial test in our app.tsx file to verify that we can log in and log out.
First lets retrieve the instance of our MSAL provider:
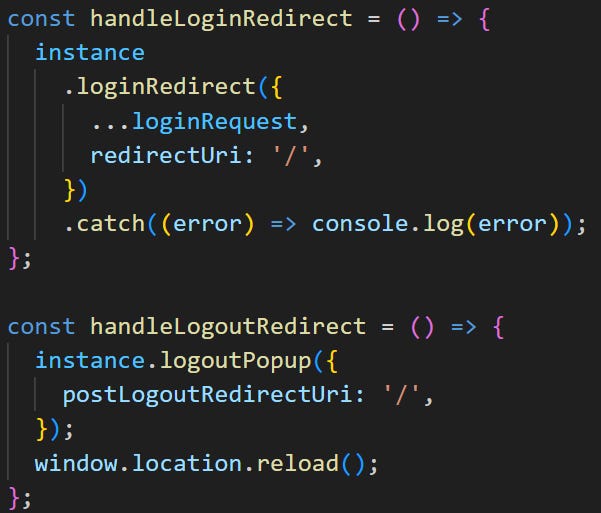
Then, lets create a login and logout request handler:
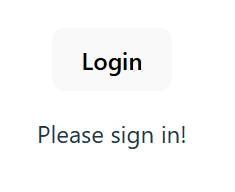
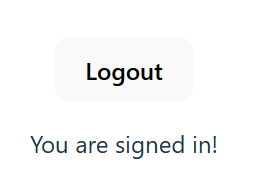
Then, lets change to use an Authenticated Template or an Unauthenticated Template. This will be dependent on whether or not the user is logged in:
And voila! That’s everything to get started.
You can go to the application and verify you can log in and log out:
And to end…
That’s all from me! In the next episode I’m going to be showing you how you can use MSAL to connect to an API that requires authentication and authorisation.
What would you prefer the backend to be in?
Python
Node
.NET
Let me know in the comments below!
If you liked this article, be sure to checkout my YouTube video here:
And also like, restack and subscribe if you found it useful!
You can also checkout the GitHub here.
Articles I enjoyed this week:
By
By
By







How to redirect login based on devmode and production mode?
I’ve been working with Azure B2C (Microsoft Entra B2C ?) for a while. I mainly create APIs tho, so I never thought of creating an app registration for the front end and another for the backend. A really good insight to make, I feel like it’s the first time I hear the suggestion. It makes total sense, you don’t want the front end to share permissions with your backend, however, I feel like I’ve never seen this suggestion in Microsoft documentation.