Auth Made Easy: FastAPI with Azure
In today's article, we breakdown how to get authenticated using FastAPI Azure Auth
Let’s preface this, I’m not a Python developer, but Python has become a part of my every day life at Microsoft. Many of our customers use it, many of my peers use it, and so I occasionally have to use it too.
I quite like it, and getting up and running with it is relatively easy. By popular request, I’ve created a how-to guide on how to get up and running easily with Azure auth.
For this tutorial we will be using Python with the following libraries: Fast-API and FastAPI-Azure-Auth, it also assumes you already have Python installed.
1. Getting the virtual environment sorted
First of all we need to get our python environment up and running. A virtual environment allows you to install your packages in a location that’s isolated from the rest of your system. This means any of the dependencies we install will be localised to this environment, this is really useful when you’re working with multiple python projects to ensure nothing gets conflicted.
I’m using bash so this involves creating the environment:
python3 -m venv venv
This will create a virtual environment folder, in order to activate you virtual environment you can then run the following command
source venv/bin/activate
This will mean that you are now inside your environment
Note: I’m using bash inside my WSL environment, if you are using Powershell or similar, there is different commands needed. See here for further details.
2. Installing the dependencies
Firstly we need to install FastAPI and Uvicorn, which are needed in order to run fast api:
pip install fastapi uvicorn
And we need to also install FastAPI-Azure-Auth:
pip install fastapi-azure-auth
And they should be the only dependencies we need!
3. Adding an example endpoint
In order to get the initial project set up, I’m just going to create an endpoint that returns a list of students.
I’ve created the following files:
- students/students.json
- students/students.py
- main.py
In the students.json file, I’ve used a website called mockaroo that allows you to create dummy json data that you can use to return mock data. I find it really useful for creating endpoints like this.
Then we set up the students.py file which is going to contain the students endpoint that returns the list of students.
First, we register the router:
from fastapi import APIRouter
router = APIRouter(
prefix="/api/students",
responses={404: {"description": "Endpoint not found"}}
)
Then we create the endpoint that is just going to return the contents of the students.json file:
@router.get("/")
async def get_students():
with open('./students/students.json', 'r', encoding='utf-8') as file_object:
return json.load(file_object)
Once we have set up the students.py file, we then need to set up the main.py file which will contain the configuration for our FastApi and register our students router.
Firstly we’re going to add:
app = FastAPI()
And then we’re going to register our router:
app.include_router(students.router)
And this should be everything we need to get up and running with FastAPI.
We should be able to test this by launching our application in vs code and going to swagger:
http://localhost:8000/docs
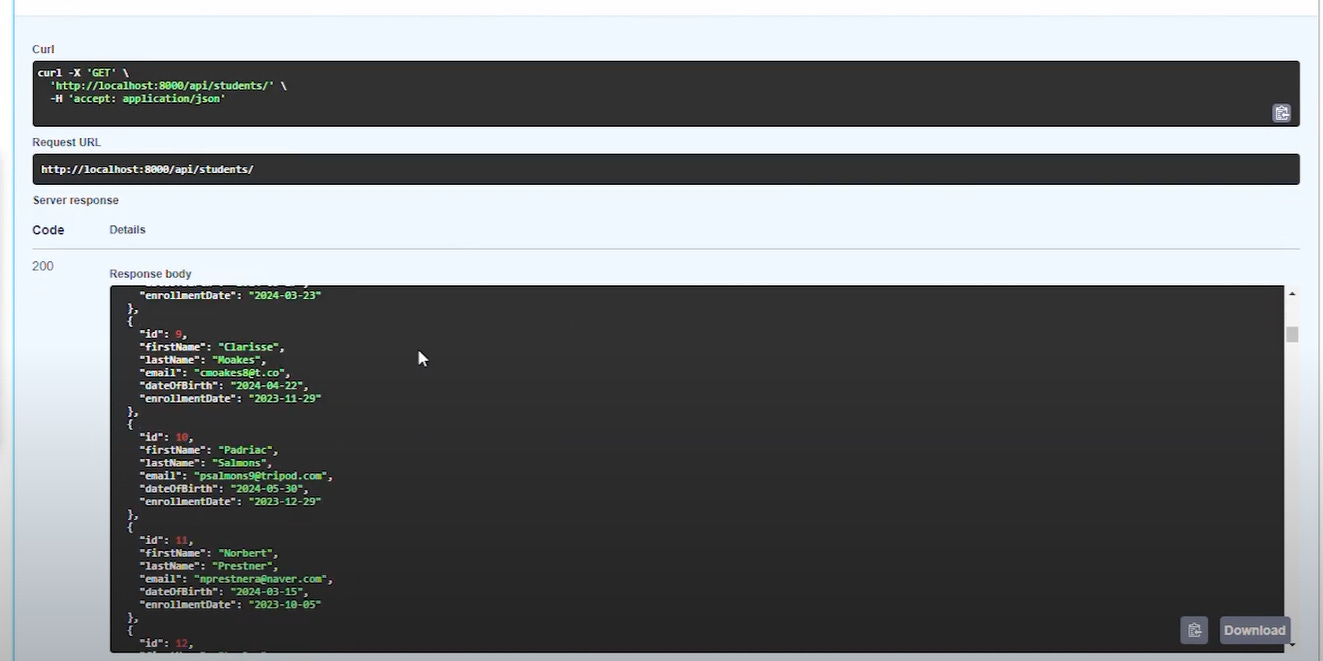
And testing the endpoint returns the students data:
4. Setting up the azure auth
The next thing I’m going to do is set up the FastAPI-Azure-Auth, to do this I first create the following file:
- auth.py
Which is going to contain the scheme, in order to add the scheme you have to ensure we have the correct details of the app registrations in Azure.
If you remember from my previous tutorial we have already set up the app registrations for both the frontend and the backend, so if you haven’t done this, set this up first.
Here is the scheme we will be adding to the auth.py file:
azure_scheme = SingleTenantAzureAuthorizationCodeBearer(
app_client_id='b295d89d-31ac-4741-95ce-2e9bcd58ddda',
tenant_id='3f63b506-db59-465e-8d23-78c6cd72c13b',
scopes={'api://edutaskhub-be/access_as_user':'access_as_user'},
allow_guest_users=True
)
Where:
app_client_id: is the client id of the backend-app registration
tenant_id: is the tenant id of the current azure tenant
scopes: is the scope we created for the backend
allow_guest_users: only set this to true if you are using a guest account like me
And I’m also going to update the FastAPI configuration in the main.py file so that I can test this via the swagger page:
app = FastAPI(
swagger_ui_oauth2_redirect_url='/oauth2-redirect',
swagger_ui_init_oauth={
'usePkceWithAuthorizationCodeGrant': True,
'clientId': '5d31bed7-2372-4e43-9365-1706ff6601de',
'scopes': 'api://edutaskhub-be/access_as_user',
},
)
Where:
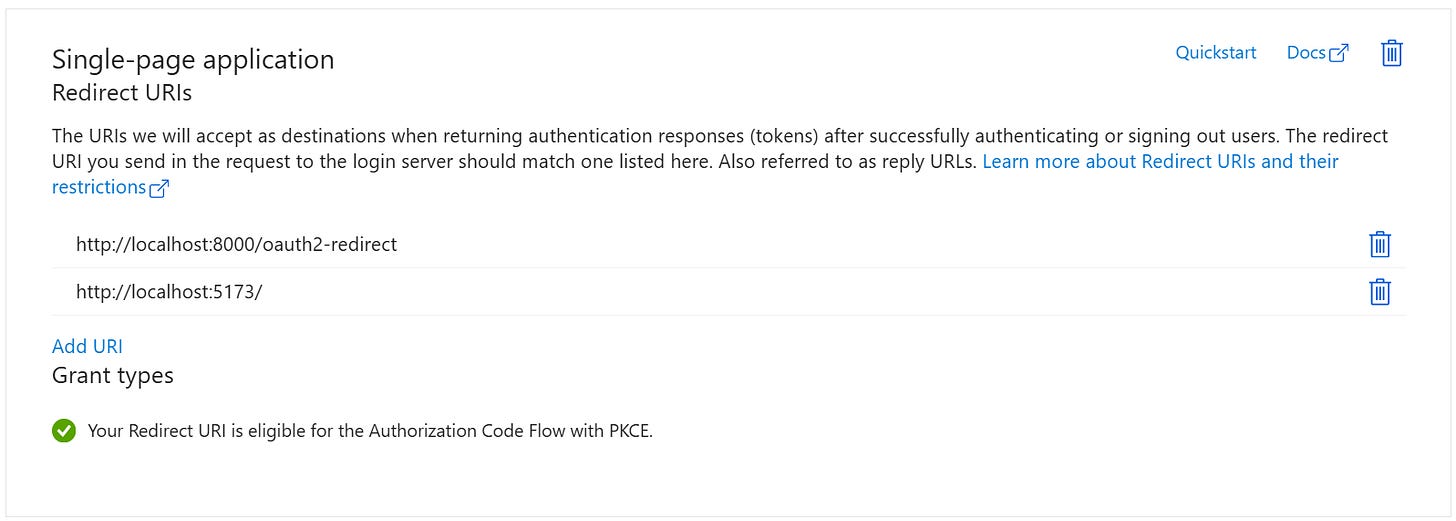
swagger_ui_oauth2_redirect_url: is the redirect URL of the frontend application, I had added this redirect url to the frontend app registration in the portal:
usePkceWithAuthorizationCodeGrant: set to true to specify if thats the grant we are using
client_id: is the client id of the backend-app registration
scopes: is the scope we created for the backend
The last thing to do is to configure the router to require auth scheme:
app.include_router(students.router, dependencies=[Security(azure_scheme)])
5. Testing it all works
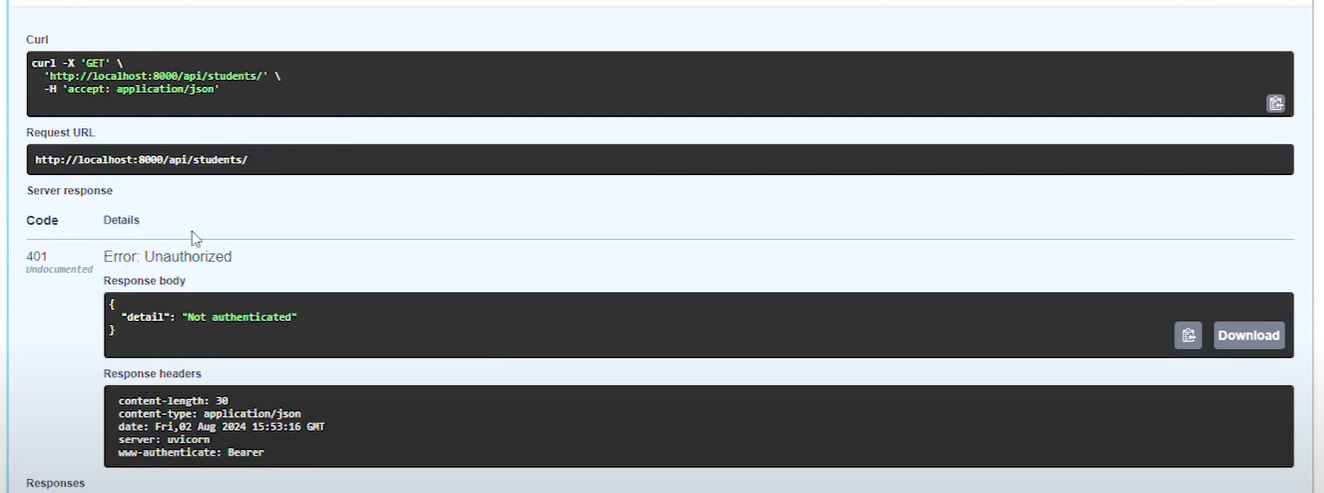
And there we are, we should be able to use the swagger to verify we cannot access the endpoint without logging in:
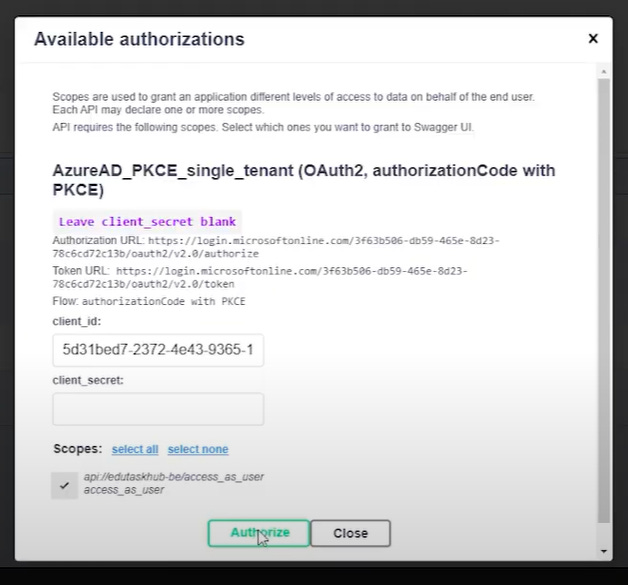
And then if we log in:
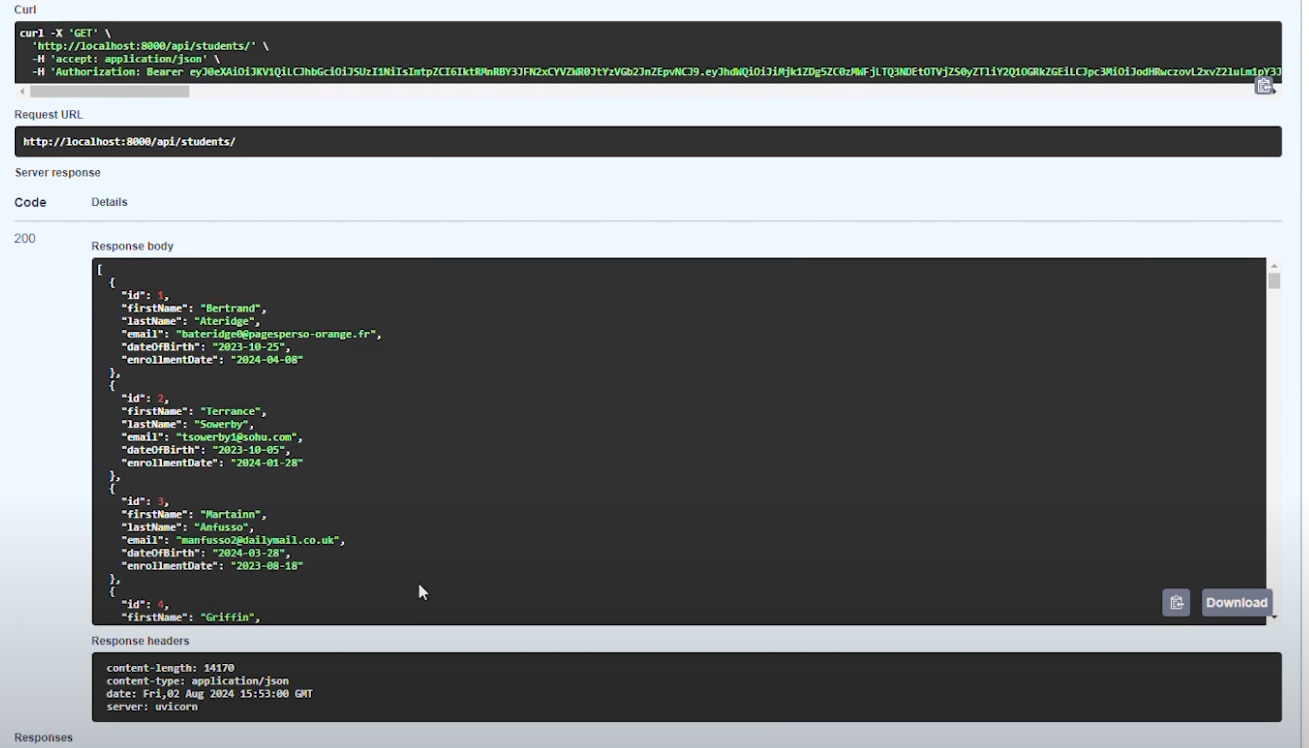
We should get a successful response:
And that’s all from me, if you’d like to see the video of this go here:
And if you’d like to see the example code, visit my GitHub.


